Mrs. J currently lives in Vancouver, B.C., Canada.
Mrs. J's Folio
  • Welcome
  • ePortfolio
    • Standard 1
    • Standard 2
    • Standard 3
    • Standard 4
    • Standard 5
    • Standard 6
    • Standard 7
    • Standard 8
  • OLTD Portfolio
    • OLTD 501
    • OLTD 502
    • OLTD 503
    • OLTD 504
    • OLTD 505
    • OLTD 506
    • OLTD 508
    • OLTD 509
    • OLTD 510
    • OLTD 511
  • Breaking Barriers: Inquiry-Based Learning
    • Foundations of Education
    • Social Justice
    • The Inclusive Classroom
    • Community Action Project
  • Resources for Online Learning
  • My Learning Journey
  • About Me
  • Contact Me
  • ELL Post-Grad
    • ELL 1
    • ELL 2
    • ELL Specialist
    • TLIS
    • Student Assessment and Evaluation

I thought I Thaw a Thinkercad

2/19/2017

0 Comments

 
I have been working on the second course of my 3D printing specialty through Coursera: 3D Printing Applications. It digs deeper into things we only touched on superficially in the introduction course. I really enjoyed this read about the ten principles of 3D printing, and was looking forward to future courses, when we will actually design our own models.

I started getting impatient, however, when I realized that I was going to keep this wonderful class of grade 5 students for a while until their teacher recovers. I think it would be awesome to be able to prepare a project for them  that involves 3D printing, that is fun and rewarding to work on. 

So, I approached the librarian on Friday and asked her if I could make a project with my students that involved 3D printing, and she said YES! Another teacher mentioned Tinkercad, and how she was designing animals with her students from Grade 2. I decided to give it a look-see.

Usually, things online are not only glitchy, but awfully slow. I am very leery of this kind of thing, particularly since the computers at school don't have the best internet. I was pleasantly surprised with how quick Thinkercad is, however! The learning curve is pretty smooth as well.

I looked through the 5th grade curriculum and was intrigued by the concept of interconnectedness. So, I thought of a project in which students had to invent their own creatures; where would they fit within the ecosystem and in relation to other creatures? How do these creatures depend on each other? Through this exercise, I will have the opportunity to link nature in our world and how everything is interconnected, and how we must care for all things in order for all of them to survive. In the end, we will have a printed stable of creatures plus their plan, which we can make into a fictional class book.

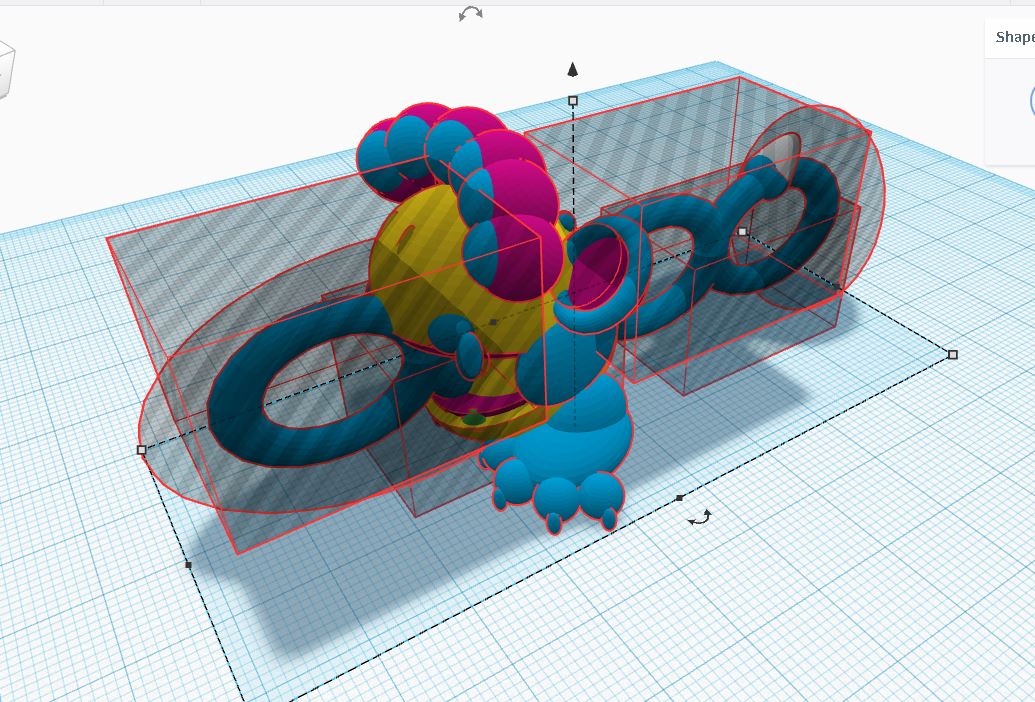
So, as an example, I started working on my own 3D monster using Tinkercad. In Tinkercad, you can use shapes as solids or as holes -- below, a picture of my monster with all solids and holes apparent, so you can see how complex these things can get. It took me three hours from the time I started learning the program to when I was satisfied with my little guy. There were some glitches and some times when I had to use funky workarounds, but overall, a very positive experience.  I called him Derp!

Picture

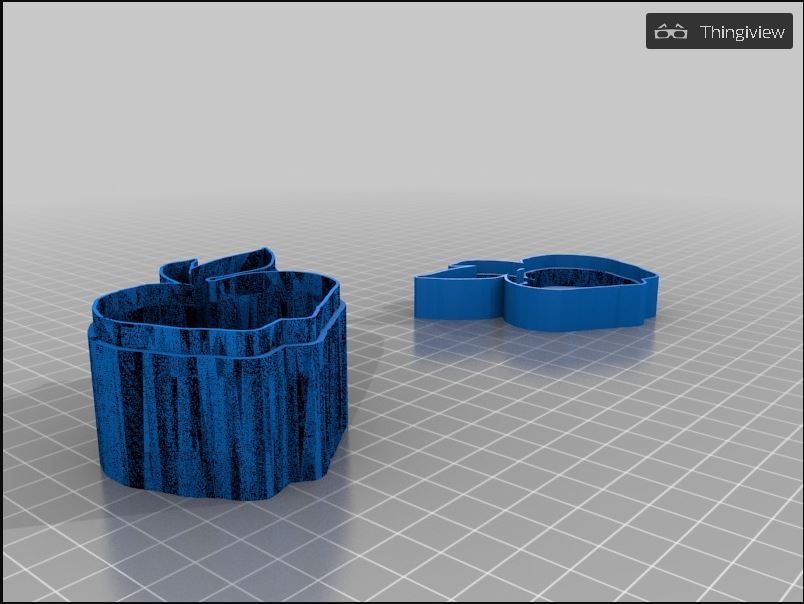
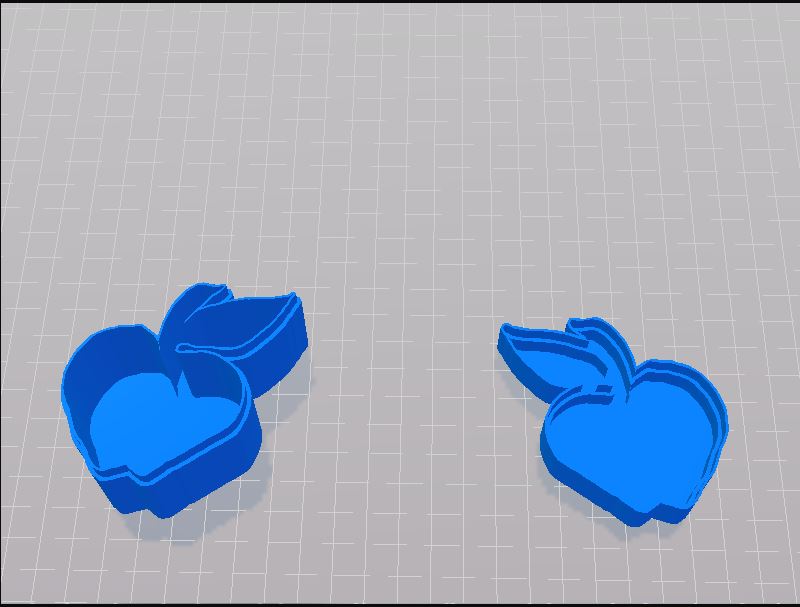
I uploaded him to Thingiverse to share him with others :D

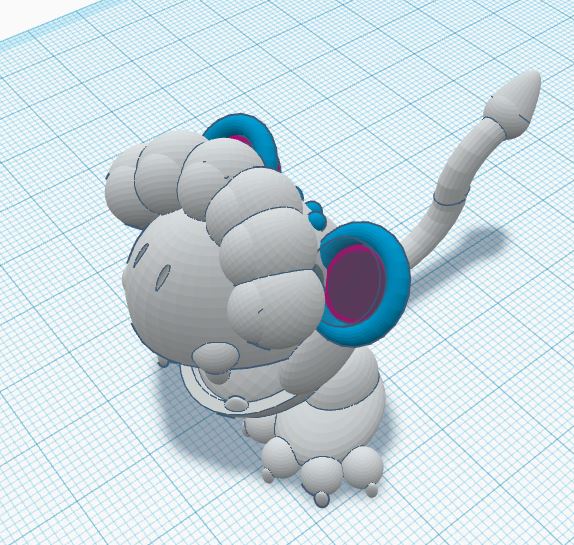
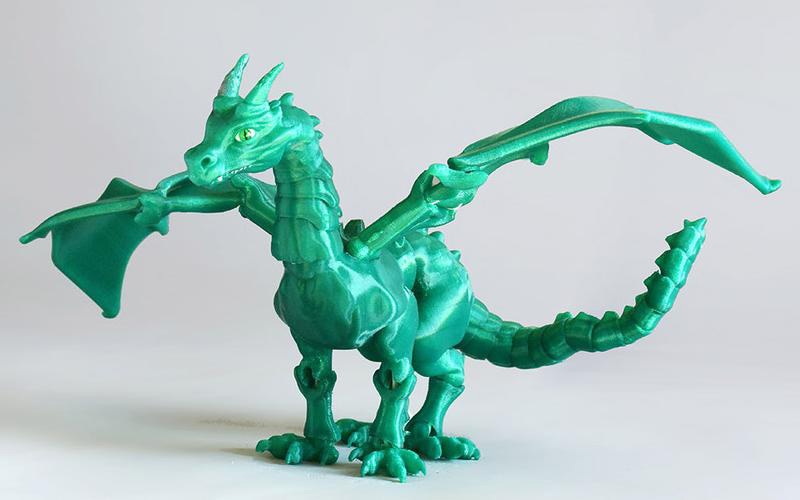
And below, what he will look like once he is printed! I sure hope he stands up. I think I balanced him well enough, but he may topple one way or another. We will see!

Picture

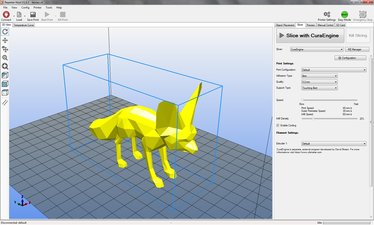
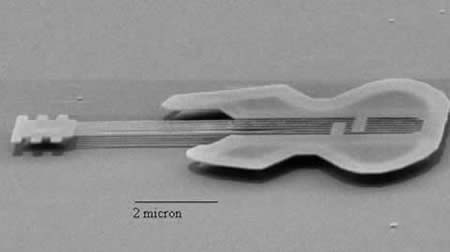
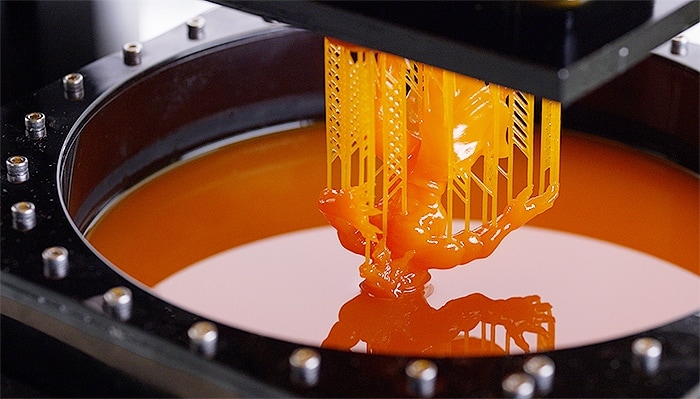
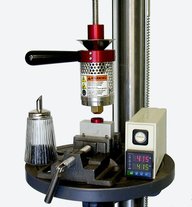
To make him printer-ready, I downloaded Cura, which I mentioned before in a previous post. Cura is a free program that prepares the models for printing. I processed my little guy with it, and tomorrow I will give this a shot! I am going to try and print out Derp on the school 3D printing machine!! I am so excited -- hope he will work out. If my calculations are correct, he will be around ten centimetres tall!

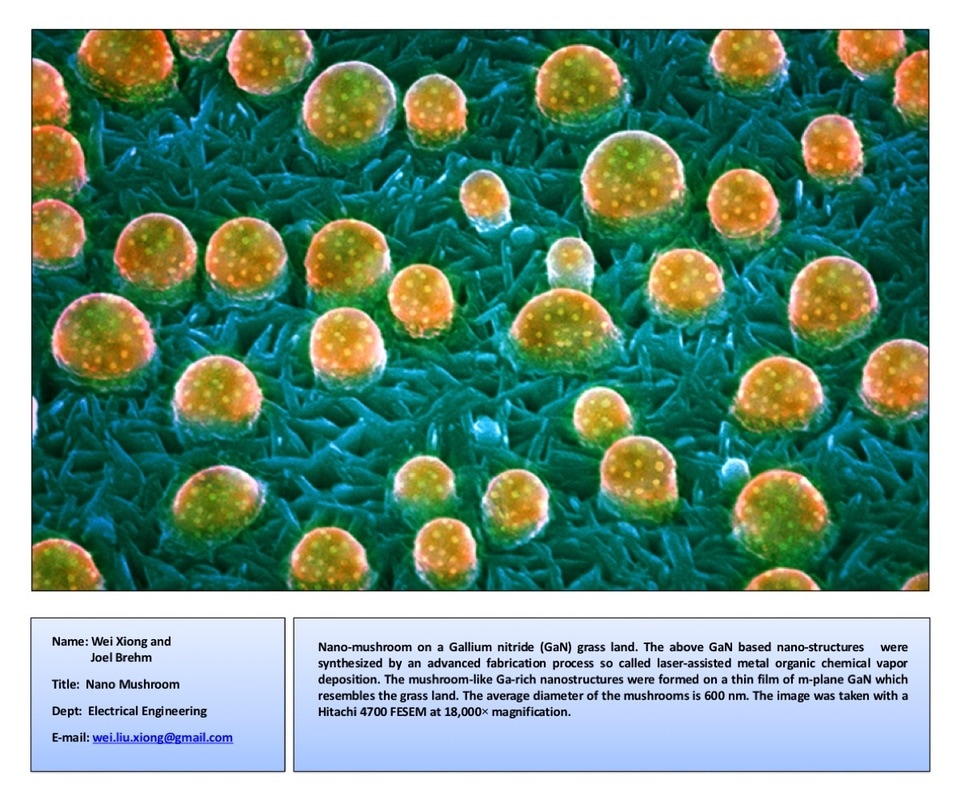
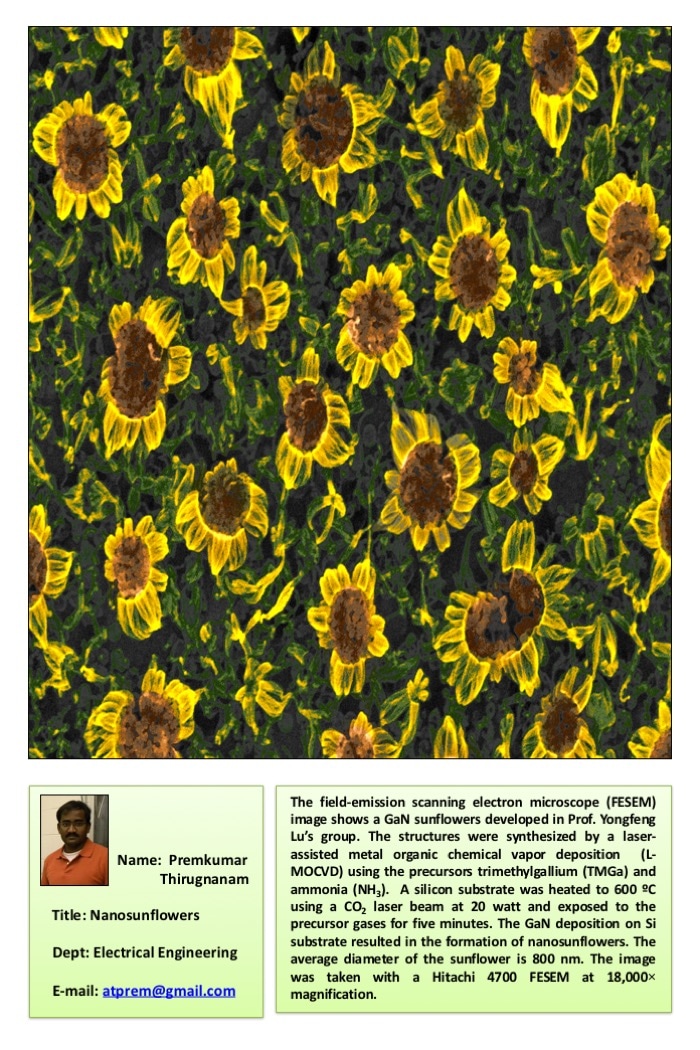
If not, I may need a microscope. To be continued...
0 Comments

Thingiverse and Shapeways: Helping Shape the Future of Things

2/12/2017

0 Comments

 
Picture
So, thanks to Avi's awesome course on Emerging Technologies from OLTD, I have fallen into and finally resurfaced from the 3D printing rabbit hole. I just finished the work for "The 3D Printing Revolution," the introduction course on a 3D Printing specialization I am doing via Coursera. I learned a great deal about 3D printing these days, including about materials which are available right now for prototyping and printing, and I must say I am very excited to start prototyping and designing myself.

As our final project for this introductory course, we took a look at Shapeways, a place where you can print your ideas as well as join a marketplace much like Etsy. People can have your object printed and sent to them in a wide variety of materials, from plastic to metal and ceramics (no chocolate yet, boo!).

We also looked at Thingiverse, a place where you can download models from other users for free and modify them, then reupload and reprint the model. It's a really fun open-source library of things!  If you want a wrench that fits your hand just right, for instance, you can modify it to be bigger, smaller, thicker... it really is an amazing resource. Our final project for the course was to find an object and modify it somehow.

I looked for an object which could provide me with the widest possibility of modification, and finally found a box, done by Thingiverse creators themselves. Their editor offered an area, and you can pretty much make a box shaped like anything you can draw on that area. It's not as easy as it seems, and I found it a little glitchy with my pen, but it worked out in the end! My first thought was to make a small treats box for my dog, so I set out to make a bone-shaped box for him; however, after many attempts, I was unable to make a box that looked like a bone... it was very lopsided. So, I went with a candy box shaped like an apple, since I am a teacher and all :) it took me about 20 attempts. Not super perfect, but Thingiverse is not a modelling software!

Picture
Picture
And now, I can print this box if I want to!

The process of 3D printing really is revolutionary. I believe we are witnessing the same type of mind shift that happened between Gutenberg's printing press and our desktop printers. Still, printing real objects is not as simple as printing paper, and due to the ease of doing your 3D printing online, it is possible that only people who really enjoy creating things frequently will have one at home. I am pretty sure that at some point, I will have one... I am having some great ideas for artwork involving moving pieces, musical instruments and other gadgets!
Picture
According to "The 3D Printing Revolution," there are four clear advantages of 3D printing:

  1. Sustainability. Low waste. On average a 3d printed product uses 90% less material than an object made using subtractive manufacturing.
  2. Self-assembly: We can create complex products that come out of the printer self-assembled. As long as you leave a certain clearance between the pieces, they can come out of the printer all assembled and ready for use. A fuel injection for an airplane which we saw on the course used to have 26 separate components which had to be injection molded and assembled; now, it comes out of the printer ready for use!
  3. Digitization: 3D printing creates products out of digital files. This puts an object on the same category as a music file: objects now can be shipped electronically, downloaded and printed locally. You don’t need to spend money with shipping anymore. They can also be easily modified and remixed, just like music. All of this eliminates the financial, temporal and environmental impact of manufacturing.
  4. Scope over scale: injection molding became so popular because it decreases the cost the more you print. With a 3d printer, it is just as easy to make 1 object as it is making 100. The setup cost is virtually zero. Now, a small startup can compete with a big corporation, and anyone can start their own manufacturing. And a new business doesn't even need to have their own 3D printer! They can just have the idea and go to a local Maker Space, or to a place like Voodoo manufacturing, for instance. Voodoo manufacturing is a high volume 3D printing provider that has been around for a couple of years, and is able to help people print a couple hundred copies of an item without any initial setup cost. They have a room filled with a couple hundred 3D printers, and can produce a large order in a very short amount of time. While they are the first high volume 3D printer company, I am pretty sure they won't be the last.
So, the real revolution comes when you look at small businesses who had a good idea, but no way to compete with large businesses. Traditionally, it took a huge amount of capital to invest on the initial set-up of a new gadget. An injection mold machine makes it cheaper to print in large scale, but the initial set-up cost would be prohibitive for a small company. Big companies can also make tens of thousands of units of a certain gadget, and store these in huge warehouses for later sale.
Picture
In comes 3D printing, and now the initial setup in order to create an object is virtually gone. A small business can visit a maker place and get help from a guru model maker, create a working model of their idea (even with many parts!) and print only a few units of it.

Now, anyone can be a creator and a producer of ideas. For our students, this is an enormous shift in perspective. Instead of buying things they want, they can start making their own things, and make them in a way that is unique and customized to their needs and interests.
So, where is this train going, and why does it matter for us?

The reason 3D printing is so impactful, in my opinion, is because it has the potential to be so green and to shift manufacturing so completely. Instead of having things produced far away, wastefully, and abusing human resources, companies will be able to produce locally, with minimal waste, and only what they need. That's another amazing thing about 3D printing... it is an on-demand solution for our needs. When I had my (now, dead) publishing house, I opted for on-demand printing for two reasons: one, it eliminated my setup costs. Two, it had the least negative impact of all. The books could be printed on-demand in North America, where I knew workers were well paid and treated well. The wood's origin could be tracked down, so I knew that the wood came from replanted forests and it was very sustainable. I also made sure that a tree was planted for every book sold. I felt pride knowing that my company was not affecting the world negatively... and I am sure that many startups feel the same way about 3D printing. Finding ways to make our goods production more environmentally friendly, and to produce things in a way that it doesn't hurt people anywhere, has to be a top priority. Manufacturing can be more humane, and in fact, it must be. This is where we can make an impact as teachers, I think... showing our students that there is another way, and that they can be inventors, creators and entrepreneurs without high cost and without big manufacturing; they can blow the wind onto their own sails without hurting others, or the planet.  
Picture
So, this is the time to jump on the bandwagon, guys! Let's get the kids interested in this type of manufacturing, because when they get out of school, things will be much more advanced. One thing I noticed it, these people who are at the forefront of the 3D printing industry, and changing the face of manufacturing -- most of them were exposed to this while they were in school. Look at the impact we can make!!! I can see a unit completely geared towards making a product and selling it in the school... I can see uses in art, math and social studies... this opens up so many possibilities.

Things are not "done cooking " yet, but the cake is starting to smell really good. While 3D printing has been growing at a much slower rate than expected by enthusiasts, this has been shifting in recent years and things are picking up. There has been an explosion of hardware companies making 3D printers; there are now over 300 companies versus only two companies back in 2009. There also have been huge advancements in 3D printable materials, with new ones coming out all the time. Finally, 3D modelling software, which were originally hand-me-downs from subtractive manufacturing days, are now being launched with 3D printing in mind, and that will be a huge help for creators everywhere.

I am really looking forward to the next course in this specialization, and even more to the one which will allow us to install and use the software to create our models. I will continue posting on the Google+ account because I think you guys might like seeing what happens next! So, stay tuned to future 3D printing developments. :D

Sources:
Printing Press
Brain with bulbs
Fox

0 Comments

Dipping my Toe on Nano Things

2/9/2017

0 Comments

 
I was checking out the emerging technologies, and came upon a world economic forum post with the top ten emerging technologies of 2016. Number one on the list was nanosensors and the internet of nanothings. It seems like the nanotechnology movement has become expanded into so many different areas these past few years.

Peter Diamandis describes Nanotechnology as the “science, engineering and technology conducted at the nanoscale, which is about 1 to 100 nanometers.” Working in this field means that you are looking at a microscope, adding and constructing on a molecular level; basically, you are solving huge problems with tiny tools.
Picture
Picture
Healthcare, for instance, is one of those areas that are benefiting from this new approach to things. Scientists are inventing new ways of delivering medicine that ensure the medicine gets to the right place through the use of nanotechnology and modifications that adapt the medicine to reach the diseased area faster and more efficiently. There is even a possibility to cure cancer by using genetically modified white cells which attack only the diseased tissue. The human genome is being analyzed by nanotechnology in order to understand why there is so much apparent “junk” DNA in its construction. While we don't have tiny, tiny disease-fighting robots quite yet, we are getting closer; scientists are even developing nanorobots that would be able to help with diagnose when injected into a human being. And that’s just looking at health and the human body. There are many other applications, from energy production to communications. This idea of looking at things really up close soon got me thinking about my favourite subjects, and of possible ways I could tap into these ideas and use them in my classroom in the future. How could we use nanotechnology with our students in order to introduce the concept of working at a nanoscale? This introduces a whole new field of study for them, and I am all for getting students interested in science, particularly girls.

While it would be great to build a tiny robot that can imitate an ant, and keep it in your pocket with you always, it is just not feasible at this juncture. The first possible thing that came to my mind was the use of an electron microscope to somehow build models with the students; would this even be possible? Upon research on that topic, I fell upon something that sounded as exciting as it looks: Nanoart.

Picture
"Nano Mushroom"
Wei Xiong and Joel Brehm

Picture
"Nanosunflowers"
Premkumar Thirugnanam

Picture
"Nuclei"
Ehsan Rezaei


Picture
Nanoart is produced by artists who are also scientists, usually created by organizing a chemical reaction of some sort, and recording the resulting images through an electron microscope. Because of the way the electrons produce the image, you are left with powerful lights and darks, creating a beautiful balance and very impactful artwork. Artist Chris Orfescu, founder of Nanoart 21, for instance, has been experimenting with this for over thirty years; his artwork (left) includes image manipulation with Photoshop post-production, where he adds colour and gives his own flair.

Picture
So, I am here now dreaming of these science-art hybrid experiences that would take the experience of microscopy leaps further with my students. I imagine a day where my class will be able to create chemical and physical reactions that will produce nanoart, and then be able to photograph these and modify them to produce large prints of these  surreal still lives and landscapes, like the one to the right.

Some artists have been getting very creative in nanosculpting. Check out these models found on Technology Bloggers:
Picture
Picture
Picture

One day, maybe we will have easier access to tools such as these. Meanwhile, there is something I can do with them to introduce them to this type of artwork. Thankfully, there are thousands of great microscope photos online that can be used in order to enhance and create two-dimensional artwork that is unique to the student. When done right, a photo can be used to produce artwork and the resulting piece is not considered an infringement of the photographer’s intellectual property.
Picture
Picture
Picture
I found these three pictures above to use as sources: the first two are from electron microscopes, and the third is a clipart splash of paint. I played with them for a while, and came up with the composition below. This could be used as a source for a painting, for instance, or modified even further through filters and other means.
Picture

I would love to try using an electron microscope to produce art; the lights and darks, the volume that the microscope depicts, make any mundane subject a beautiful thing to behold.

I am starting to see a correlation, however, between this kind of image generation and 3D printing. The process to create art with an electron microscope produces a unique 3D-looking object that can be used as a source for artwork; meanwhile, I have been using models on my own artwork for years, and find that only with a model of what I am trying to create, I am able to reproduce light in a realistic way.
A benefit of 3D printing is that the results are not as unexpected as what you can get from chemical reactions seen under the electron microscope. You can create a unique model (your very own monster, dragon, setting or landscape), which then can be used as a model for your artwork! All students in a class could develop their painting starting from a three-dimensional model, in essence their very own still-life, and the whole thing would cost just a couple of bucks to pull off.
I think I just had another breakthrough regarding the uses of 3D printer. The more I explore other things, the more I keep coming back to it!

Sources:
Nanorobots: Where we are today and why their future has amazing potential, May 2016
Genome News Network
Science as art competition blog
Green cauliflower
Giant green cell blue centre (nerve terminal)
Fat cells
Yellow canyon
Explosions: Fanny Beron 
Electron 1
Electron 2
Deviant Art Splash
Nanobot image

Finger bug
technologybloggers.org
0 Comments

Game- Based Learning and the Minecraft Phenomenon

2/9/2017

0 Comments

 
Everyone can agree that games are a whole lot of fun; even if you yourself are not fond of playing games, you can certainly recognize the appeal it has on a large percentage of the population, particularly if we consider younger people. Even if we look at only electronic games, and forgetting all the fun that can be had playing Monopoly, for instance, the number of enthusiasts is still staggering. According to the Entertainment Software Association of Canada (ESAC), 54% (click for full report) of the population in Canada considers themselves "gamers" -- this is a huge number of people, and it does not consider some people who may be fond of games but play them only casually.
Picture
Picture
For me, playing games has always been a lot of fun. Since I was younger, they were my favourite past-time. I loved board games as well as videogames! I remember the first videogame my father purchased -- it was an Intellivision, which had the best games ever. I loved it! I was always excited about playing and beating my own records.  Although fun, the games mostly had no hidden agenda, and at most, taught us to think quickly and build dexterity on our fingers.

Now, fast-forward a few years, and we are faced with a revolution when it comes to using video games to enhance the learning process. Educators realized that they could use everything that is best about gaming to encourage children to learn. By shifting and adapting only a few things, we can turn the motivation and energy that kept me going when I was a child towards helping children develop a series of skills, including critical thinking. These deep learning experiences are only enhances when the environment provided by the game is immersive and open-ended.


Of course, using games to enhance learning don't require any actual technology; educators have been using games for decades to bring an element of fun into their classroom. I have successfully used the board game Evo, for instance, to teach grade 6 students about evolution and natural selection, as well as the board game Dixit to enhance language art skills. But adding technology to the mix makes it even more relatable to the new generation... and few games offer the flexibility and creative openness as Minecraft.
Minecraft is certainly a phenomenon, and kids simply love the game’s ability to build their world and try out different things in their environment. It didn’t take long until teachers started using it, too, and there is no limit to the number of ideas you can find nowadays involving Minecraft. Dan Bloom, a science teacher, was able to work together with a game developer to create a realistic model of an animal cell, for instance, by using Minecraft's educator tools. This provided an experience to the students which could not be replicated using a traditional lesson plan. According to Dan, student engagement was at an "all-time high" and even students who didn't feel connected to science became interested in the material, as it offered them a platform they could connect with.
Picture

However, the experience could be made even more powerful if we looked at the students as content creators instead of simply content users; what if we had them develop their own cells instead of navigating models created by us? Thinking of the students as creators of their own learning is less work for teachers, and provides more learning opportunities for the students. We could even go a step further and ask students to create modified models of the cell; maybe one cell needs much more energy, such as a neuron, or a cell produces much more excretion matter. How could they modify this model in order to fulfill the cell’s needs?
Andrew Miller, a teacher at Shanghai American School, wrote a blog post that discusses ideas for using Minecraft that are a little more student-centered. He suggests students creating, for instance, challenges for each other, which could be useful in learning some mathematical skills. My favourite suggestion from the blog was to use Minecraft to recreate a scene of a story, or even a play, to recount events that happened. This would be good for literary arts as well as history. I read a while back (and don't remember where) about this teacher who used Minecraft in survival mode to teach students how difficult it was to arrive at a new land and have to battle the elements and build a place that would survive the nightly attack of the creepers. This put his students right in the middle of colonizers arriving at a new land; what a wonderful way to connect students with the material, and create those connections and deeper thinking that enrich their experience at school.
Picture
Using games to enhance learning is a legitimate and caring way to involve the students in a level that they are comfortable with, and excited to try. However, it is important to always consider if your efforts and your ideas are really a game-changer (no pun intended). Is the inclusion of the game element going to increase understanding, or provide something that a regular lesson would not provide? If so, then using a game is the best choice; however, as everything in education, moderation is crucial to keep students motivated and to provide a cohesive education experience. A string of games that take twice as long to cover a topic is not ideal; but one or two rich experiences using games can help your students learn the material in a more meaningful way.

newzoo_free_2016_global_games_market_report_1_.pdf
File Size: 10549 kb
File Type: pdf
Download File

0 Comments

3D Printing - More to Learn!

2/7/2017

0 Comments

 
This weekend was absolutely awesome. I learned an amazing deal about 3D printers, the materials that they use and how they differ from each other. 3D printing works by getting a material that is soft and making it hard, or getting a material that is hard and making it soft, and then hard again. Sounds like everything that can fit those parameters can be used as materials, and people have been experimenting with all sorts of things, from chocolate to human organs.

I was really surprised to find out that there have been 3D printers since 1986. Turns out the idea came from Chuck Hall, who coined the term "stereo lithography," which is why a file for 3D printing has the ending STL. These files can be used by all types of 3D printer, not only the most common one that we use. As it turns out, there are three types of 3D printer, and it's neat to learn about them all. Please excuse me while I geek out and talk about the scientific difference between these super cool pieces of tech!

The first one, Stereo lithography or SLA, is really the stuff of sci-fi movies: a laser beam swims around a liquid, and as it touches the liquid, it hardens the material. The object rises from the liquid, like magic. The materials are made of resin, and normally not very strong; they are good for little things such as jewelry or chess pieces, but not for a car part, for instance. You can find a desktop version of these machines for about three thousand dollars.

Selective laser sintering machines (SLS) are a little like SLAs, but instead of using a liquid, they utilize a fine dust. So, the laser touches the dust and fuses it together just right, to create a piece that literally emerges from the dust. This dust can me made of a variety of materials, even metal. These pieces are high resolution, and super strong. You can even print airplane parts with this! However, the thing is super expensive, the cheapest one being thirty thousand.

Finally, Fused deposition models, or FDM, are the machines we are used to, commonly found in our schools. It works by melting a filament that is then extruded through a nozzle, which moves in all directions through a set of arms and gears.  The range of materials that are available is constantly growing; the most common one is polyactic acid, or PLA, which is actually corn-based and completely biodegradable.  You can find them in a range of prices; Amazon has them for a few hundred bucks.

Picture
SLA
Picture
SLS
Picture
FDM

One thing that really amazed me was how cheap the material generally was. Knowing that the material is biodegradable, and knowing that each model probably only costs 20 to 30 cents, just makes me feel so great about advocating for the use in schools. The material spools of plastic are just twenty bucks a kilo; they come in all sorts of colours and are pretty long-lasting.

I just have to get over the time it takes to print anything... but hopefully this, too, is getting improved with time?

I was a little bummed by the very visible ridges that appear on the final models using FDM technology, but after a little research, I found that the models can be smoothed out with a brush and a piece of rag moistened with acetone (not very environmentally friendly, but hey, we use nail polish remover all the time, and it sounds like this uses much less!). The best way is acetone vapor, but the words "acetone" and "vapor" together in the same sentence make me very nervous.

Picture

Another thing that amazed me was how complex the file itself has to be in order to print a 3D object.

Like I said before, every 3D object is saved into an STL file; STL is like a PDF for 3D printing. But here is the thing -- an STL file is not ready for printing. It's just your model, done really nicely, but not really carrying any information regarding what to do with it.

This file needs to go through a process called "slicing," where the object is not only sliced, but where the software analyzes and comes up with the best path for the nozzle to follow in order to build the object, creating a little map.  Each printer comes with its own slicing software; Cura, for instance, is the free program that comes with Ultimaker, and it is the program that will turn the STL file into something that can be read by the printer.

While you are slicing, you can also control how thick you want the object, and how much filling will be used... so you can control waste of material as well.

The printer follows this recipe and prints out the 3D model. Isn't this cool? :)

I'm really looking forward to learning how to design my object as well as preparing it for printing... and of course, holding that little musical instrument for the first time!

And, speaking of 3D printing musical instruments... after a short search online, it sounds like musicians are even more excited than me about the possibilities!

I'll leave you guys with this 3D printed guitar! Fun, right?
Picture
0 Comments

Down the 3D Rabbit Hole

2/4/2017

0 Comments

 
Picture
Oh boy. So, after looking at some of the information on 3D printing through our 509 coursework, I ended up signing up for a 3D printing specialization through Coursera!

The main teacher is Aric Rindfleisch, but the course so far has brought to us many different views from professionals in the area. I have already learned some very interesting things, and considered facts regarding 3D printing that I had not considered before.

For instance, 3D printing is considered an additive construction, as opposed to subtractive construction; that sounds pretty intuitive, but when you stop to think of what that actually means, it's pretty incredible... additive construction virtually eliminates waste from your prototyping! Subtractive construction, such as laser cutting or wood working, has a lot of leftover parts, and a lot of wasted material. You also need a lot of space to store a variety of wood pieces.  On laser cutting, while you can quickly cut a wood board (in seconds, instead of all the time it takes to use a 3D printer), you also have to assemble the pieces together, which is an added negative on top of the waste. On one of the lecture videos, we also saw an injection molder (pictured above), which I had never seen before; it transforms plastic beads into a single object, and can create each object in a super short amount of time; their example, a poker chip, could be done in 16 seconds! The same object would take twenty minutes in a 3D printer. But, an injection molder only builds ONE object per machine.  That is a huge disadvantage -- unless you have a poker chip factory, that is.

Picture
I liked how the course gave us an overview of all these technologies, showing us that each one of them has its place; you wouldn't want to 3D print everything under the Sun, but instead, use the right tool for the right job.

My favourite discovery so far has been the existence of Hacker Labs. These are places around the globe where tinkerers can pay a monthly fee, and basically use all the tools and materials, as well as have the opportrunity to network and find guidance from other people who tinker. These hacker labs have everything! EVERYTHING, I mean, they are amazing. They have sections with 3D printers, circuitry, metal work, wood work, injection molders, sewing machines... and they have one right here in Vancouver as well. Their monthly fee is $30... if I had more extra time, I would probably join them. Maybe someday?

As my first assignment for this course, I finished this video with my plan for my final project in this specialization. You can watch the video below! Wish me luck, everyone!


0 Comments

Printing Dreams and Futures

1/28/2017

0 Comments

 
When I was a kid, I spent a lot of time drawing or playing by myself. While one of my cousins collected dolls, and the other loved playing with pots and pans, I liked to make stories, and would use drawings and miniatures to create my stories. I had one set of snap pieces similar to Legos, in a rather large box; they came with wheels, slanted ceiling pieces and all sorts of intricate gears, which allowed me the flexibility to build all sorts of different things. I also had a few Playmobil sets, which were far different than Legos, and ultimately (in my opinion) better for creative storytelling. Besides these two tools -- which allowed me to create the background scene of my plays and stories --  I also used to collect small animal miniatures made of plastic. I still remember my first hand-painted animal set; it was a giraffe and an elephant on a vacuum-sealed plastic bubble. I looked forward to receiving those!

I had over a hundred of these animals, and soon I started painting the plain ones myself. Interestingly enough, the ones I painted myself soon became my favourites... if you didn't count the invisible ones.

Because the best things I had were actually not visible. I had purple monsters, flying horses, giant catapults, ships and cars that were out of this world... and all of them invisible. I waged incredible battles against mighty dragons, but no one would ever see them. I could draw my creations on paper, but comparing with how realistic the miniatures were, my imagination had to fill in the blanks.

The concept that someone - a human being somewhere - had created those miniatures I was playing with, never even crossed my mind.

What if I had access to a 3D printer when I was a child? What would have happened to my ability to create? To my confidence as an artist, to my sense of entrepreneurship (I already sold guavas from the front door -- could I have sold miniatures? Would I have created machines? Toys? Jewelry?)


Picture
(Dragons?)
Putting on my teacher hat, I can easily see the amazing possibilities that 3D can provide for budding artists as well as for language arts students. Having your small characters come to life to inspire your writing, or being able to develop scenes to better comprehend what you read, are obvious bonuses.

But when you look at STEAM, that's where 3D printing  really shines.

Testing the design before committing becomes much easier, and frankly, more meaningful and exciting for the student. Not only limited by their drawings and software, students now have a chance of actually seeing their design come to life. They also have a chance at experimenting with prototypes before they finalize their piece. Like teacher Ron Smith describes on this article from EdTech, “It’s important that they learn to do technical drawings and to use the Inventor software, but when you make it come to life with the 3D printer and they can touch it and feel it, they want to do more and learn more.”


3D printing has this possibility: it can bridge the learning between the theory, the "what if" and actual concrete testing and engineering.  Empowered by a world where everything they can dream of is possible, students can use the printers to explore real world problems, for instance, like these students who decided to fix the squirty water problem that happens when you use a bottle of ketchup. 3D printing fits perfectly with the Maker model of learning, which transforms students from users of content into creators of content; from  observers and users of engineering to actual engineers and tinkerers.

When your classroom has access to 3D printing, what are you going to do to expand your students' learning? I have already started collecting some ideas, like the seven projects on the file below. I am very excited about the prospect that 3D printing brings to the table.

And, of course, my inner child can't wait to explore alongside my students!

white_paper_-_seven_3d_printing_stem_projects_to_do_with_your_class.pdf
File Size: 2581 kb
File Type: pdf
Download File

0 Comments

Workflow - Ideal Versus Reality

6/19/2016

0 Comments

 
After checking out Dean Shareski's video, Sharing - a Moral Imperative, I began to understand the core importance of sharing our work as educators a little better. Small things, such as lesson plans and material we use to help students understand a certain subject, can be extremely helpful to other teachers. I loved the math video series by Dan Meyer (watch his Ted Ed here), and how he shared his video series through his blog. I liked his ideas so much, I am now following him on Twitter... which means I now have one more awesome resource which I won't have time to read.

Looking at my own current workflow as an educator (below), I find that I have not yet found my footing, or my groove. Things have been happening very fast, and there is so much -- SO much I want to read and learn -- that it frustrates me to no end when I see days and weeks and months going by, and still not being able to organize the little time I have and actually use these resources.

Due to my lack of time, health and energy, I find that my line of judgment regarding resources -- both made by me, or other people -- is that they must be extraordinary in order to propel a response from me. That's a really tall order, and really bad in the long run.

If I create a project, I look at the resources, and if it is not extraordinary, I don't waste the little time I have with cataloguing and documenting the process. I save the idea, and take a few pictures, and keep it on my Dropbox for a day in the future when I have the time to revisit it and spice it up. Worse, when I make something that is extraordinary, and document it and save it, I only share it with other educators (through Twitter or Facebook) if it looks good enough, based on my own idea of what is aesthetically pleasing or not. In other words, I am a visual snob with my own things, kicking my poor little projects under the rug when they are not perfectly polished.

If I discover something online, or find a good link with information, I only really read it if it can be done in a couple of minutes; otherwise, I find myself saving the bookmark for later, when I know perfectly well that I don't ever look at them afterwards. I guess hope springs eternal.

I think the most frustrating is when I find a good tool to use, that would possibly save me time and help me become more organized... and then I just save the link on a folder in Dropbox and never see it again. I want to be so much better than this!
Picture

Thinking of what a perfect workflow groove would look like for me, I came up with the simplified chart below. Instead of considering if something is extraordinary or not when I create a project, I analyze if it engaged students in some way, and if so, then ideally everything that gets documented is then shared. Also, if something is not engaging, then I would look online for ideas, and if I found something that I could merge with my original project, I would use this to instruct my practice and change the project into something better.

Also, when it comes to info or projects I discover online, I would like to save it first and foremost. I checked out some tools that can be used for this purpose, such as Diigo, Pocket, Evernotes and Pinterest -- I haven't used any of these properly, not even Pinterest. Getting used to these tools would make a huge difference for me. Having these available on my phone and iPad also would help me save anything that is valuable for later use (which I currently don't do).

Picture

It all comes down to organization and confidence. Organization will allow me to save projects and links I find, and actually be able to share them. Confidence (which hopefully will come with time -- this is just my first year teaching) will allow me to share everything I make without worrying if it looks pristine or perfect. If all of us educators share everything we make, then we are getting one step closer to making our knowledge a unified force, with good practices bringing change everywhere, and education in itself improving by leaps and bounds.

Sidenote:

I created these graphics using Lucid Chart; it is extremely intuitive and easy to use, with features including docked arrows that move organically as you move your bubbles. It comes with a 7-day free trial. After the 7-day trial, the basic price is $4.95 monthly, which would be great if all I did was use charts, but not for something I would only use once in a while... sigh. After I finished my charts, my husband pointed out Gliffy, which is an older competitor to Lucid Chart. While the paid version is $3.99 a month, there is a free account option, and while it doesn't let you save, you can simply finish your chart and take a screen capture of it. I tried Gliffy out and found it harder than Lucid Chart, but it is still a considerably free option. 

Still fussing over Lucid Chart, I did a search on Google for Lucid Chart Education, and found a link which allows for teachers to request a free upgrade to their account. This is very exciting! I changed my email to my school email and did my request... hopefully this will be upgraded soon.

0 Comments

LMS Build Versus Non-LMS Build

4/4/2016

1 Comment

 
Just the previous week, we had the chance to decide on a LMS (Learning Management System) and try our hand at building a mock class inside it. I had a lot of fun with this process, and was properly amazed by how smoothly it all integrated. I found Canvas to be responsive and easy to use. I was, for instance, able to copy a whole Creative Commons website, pictures and text, and simply hit "paste" onto it. Quizzes are also very easy to do, and there is a variety of options for different question styles. Communication, assignments and submissions, all are handled under the same umbrella, which makes it an easy, foolproof way of doing your course online. However, the looks of your course are limited to the skeleton provided for you.

This week, we were given the task to research educational tools online and decide which tools would achieve the same as an LMS. Out of curiosity, I decided to rebuild the course I created on the LMS and see how it would turn out without that safety net. I used Weebly as my homebase website, where everything else springs from. Weebly allowed for me to give the website a "look" that was more aesthetically pleasing, but I did hit some snags along the way. For instance, Weebly is very serious about separating photos and text; so, instead of being able to copy a whole page with text and photos, I had to add section by section, and photo by photo. All the formatting was lost, and this had to be entered manually. I hadn't used Weebly in a while and forgot how glitchy it is to change the smallest things, colours, text and everything else. I even had to restart it after a couple of hours because the front page's title was suddenly gone, and I could not make it come back! But by then, I was determined and really wanted to see if I could pull it off.

My favourite portion of it was revisiting Seesaw. It really is a simple, easy-to-use interface, and I can't wait to use it with my students to build portfolios, community and relationships. I looked online for a little video to add for my website, so students would know what to expect, but couldn't find anything that I liked, so I figured I could just make one, now that I know how to use Screen-Cast-o-Matic! The video is simple but it guides the students on the login process, as well as uploading their first photograph.

Below, you can see the two different experiences, one done with Canvas and one done with Weebly:

Picture
Picture

Based on my experience, I have decided on the following toolkit to be used when designing courses outside of a comprehensive LMS:

Picture
As a dashboard, Weebly provides a pretty impressive final product that loads quickly and has tons of features, even if it is not always smooth to build. It allows for a very slick look, customizable to what you have in mind. You can organize your modules and assignments very easily, with pages fitting inside each other like clever little Russian dolls.

Weebly allows for paying users to upload high definition videos straight into their platform, and the videos load very fast. This is great as when you add a Youtube link to Weebly, it actually allows students to start looking at other videos and completely get sidetracked from their work. Who wants that? By using their video upload feature, we can add explanations, presentations and lessons, as well as screencasts.

Under Weebly's Education program, you also have available a page for submitting assignments. The student can upload any type of file directly to your email very easily. This works really well, as I have used the feature before with one of my classes to help students submit their files easily (no need to log into the email, upload, type my email, etc. -- they could do it right when they ended the tutorial, two tabs away). The assignment arrives in my email, and so, to provide feedback, all I have to do is respond to the student on the email with comments.

You can also add a Google Calendar to Weebly (which I did not do). I can see how that would make it even better for some people, but I don't think it is necessary, as long as I have the calendar posted on the syllabus page. As long as we tell students when things are due, and send them weekly reminders, it should work well.

Finally, Weebly allows for teachers to easily create a page of resources, where all the files needed for the course can be downloaded.

Picture
Google is, of course, a great tool for communicating with students via email, but also a great tool for collaboration. Encouraging students to share docs when doing group work is a clever way of allowing for brainstorming and content-building within groups. I love the idea of using a Google spreadsheet for counting points such as The 500 -- for comments and for helping each other. I think this is a great way of giving incentive for students to help and mentor each other, and I would like to adapt this idea to do the same thing with my classes.  I hope Avi doesn't mind! :D

I can also use Google Docs to create self-assessments for my students, which are helpful for me to understand how the student thinks they did in the assessment, as well as how the student feels about their work in the class.

Google Drive is also the best way to share other types of files, and students should be encouraged to get accustomed using this tool.

Picture
Zoom is my favourite tool for face-to-face meetings. It is clean, crisp, and works fantastic. It's amazing how clear the image is, and how great the sound is, with no skips or delays, unlike other communication platforms (such as Blackboard). Zoom allows for everyone to see each other at the same time, which honestly feels like the group is all in the same room together, helping us build community and care for each other. Through Zoom, we are able to use the natural body and hand gesturing that humans use as a huge percentage of their communication. We are even able to write things or sketch things and simply lift the page, immediately sharing our idea with everyone in the group. So, this is good for communications between teachers and students, but also between groups of students. Even better, students are able to have zoom open at the same time as Google Docs, and work collaboratively on a shared document just as if they were face-to-face.

Picture
For our face-to-face meetings, I would love to create kahoots, which are little quizzes that allow for the teacher to easily do a formative assessment. Participating on these quizzes is super fun! I had a chance to play with them on one of my previous Pro-Ds and could see a huge amount of potential for engagement. More recently, I was able to use them a few times with my Grade 6 students, who loved it!

Picture
Screencast-o-Matic is an easy, free way for students to record presentations on their computer and share with the group. I think that as far as creating content, it was super easy to use and would allow for a great way to present any type of project. The recording can even include the student through a video camera, and so you could see the presentation as well as the student on one corner.

Picture
I have chosen Quizstar as my quiz component because I have been using Rubistar to make rubrics, and this is by the same company; upon research, it seems to have some good features, such as the ability to add multimedia to your questions (photos, videos, etc). It is also clean and easy to use. It allows for multiple choice, true or false and short answers (although it doesn't grade the short answers). I would like to see the quiz that matches the left side with the right, like Canvas has, but it's OK.

For my Non-LMS build, I used a quiz maker called "Online Quiz Creator" and was less than impressed with its options and the "behind the scenes". The types of quiz are very limited and the way the answers are handled is simply too rigid, which is not helpful when trying to assess students for learning.

Picture
Seesaw is a powerful portfolio creator and community builder. It is easy to use, and available for both iOs as well as android. It also works from a regular computer. With Seesaw, students can post to a common class feed, easily adding images they saved previously, photos -- which can be uploaded as they take them, from the app itself, video, as well as links for external websites. Seesaw also allows for students to post text, which would be a way for them to reflect and share their thinking to other students. Everyone can comment and like each other's posts, so students can receive feedback on their thought process. The collection of work uploaded becomes the student's body of work. The site also allows for students to collaborate and share ideas. I really love how intuitive and simple this app is to use, and how the teacher can look at the work of individual students as well as the whole group together. This also goes with my whole intention as a teacher, which is to help students create their own learning and invent content. A real slick app with great reviews!

Picture
This is a powerful gradebook; everyone that uses it really enjoys it. It is clean and allows for you to collaborate with parents. Some of the features are repeated when comparing with Seesaw, but I think Seesaw is good for a fast portfolio/community building app, while Freshgrade is more grade and assessment based.  After trying a couple different gradebooks online and as apps, I would pick this as my gradebook and run with it.

For instance, the one I used for this exercise on my Non-LMS (as I thought I would not have time to learn Freshgrade and create a proper example within it) was Simple Gradebook. I found it ugly, clunky and not intuitive. It is also one thing only -- it is only for summative assessment. Freshgrade seems to be a much better tool, more geared towards the new curriculum and focus, which is on learning instead of counting points.

Picture
Finally, Survey Monkey can be used to do exit surveys about the class. I used this for my non-LMS build and it seems to work fine. I believe there are limitations for non-paid accounts, but so far so good.

In conclusion, while the non-LMS option provides me with much more control over how I present my course, including being able to fully customize the visual and layout of my course, an LMS such as Canvas does provide a good base for building a course where everything integrates and works perfectly. I imagine that I could use Canvas as my dashboard and easily add other tools and features to it, despite liking the visual aspect of Weebly.

Building an online course is super fun, and I am willing to try new tools until I find the ones that work for me. Every year, something new appears on the market, and so it's good to keep in mind all these different categories, checking often to see what else is out there.

1 Comment

Google Hangouts and Whiteboard

1/24/2016

1 Comment

 
As part of our assignment for the week, we had to get together as teams of two and try out a new tool that we had never tried before, and play hangman online. Brad and I decided to try out Google Hangouts, as neither of us had tried it before. As it turns out, it does not have a white board option, but we found a plugin for Hangouts through www.webwhiteboard.com that was supposed to add the white board feature to the site. Unfortunately, the white board showed, but nothing else; we could hear our voices and see each other, but we could not draw cooperatively. So, we clicked on the other option also offered in the website, and we were able to use a whiteboard on one browser tab while Google Hangouts was still open on the other tab! Success -- we played a very smooth and fun game with voice and even video, if we wanted to switch tabs. It was super fun and we played for an hour! I found that the response time for the program was amazingly fast and the options were super fun to play. It was like playing face to face. It's amazing how we can have no distance barriers anymore; I can see this being so useful if trying to design something or share a visual idea over the Internet. It's so exciting to think of all the possibilities. I want to find an even better art option online to collaborate over the Internet.
1 Comment
<<Previous

    Author

    I'm a teacher who loves to write. Don't get me started! Oh well, too late...

    Archives

    February 2017
    January 2017
    June 2016
    April 2016
    January 2016
    December 2015
    November 2015
    October 2015

    Categories

    All

    RSS Feed

Picture
Picture
Picture
Picture
By Angela Jurgensen, The Soup Teacher